Kitchen Backsplash Height: Where Should It Start and Stop?
The right kitchen backsplash height depends on where the wall needs protection and where the material can end cleanly. Above a counter with wall cabinets, carrying the backsplash to their underside is a useful starting point. On an open wall, a short strip, a clearly defined panel, or coverage to the ceiling can each work—but they leave different amounts of painted wall exposed.
Before choosing tile, take a straight-on photograph of the counter wall. Mark the cabinet bottoms, window trim, counter ends and cooking area. Those boundaries will tell you more than choosing a height from an inspiration photograph taken in a different kitchen.
Jump to your situation
- Choose the coverage you actually mean
- Decide where the sides should stop
- Work around a window
- Keep or remove an existing short strip
- Check the cooking wall separately
- Turn the outline into an installation brief
Kitchen Backsplash Height: Three Different Coverage Plans
The words “standard” and “full height” are not precise enough for an order. MSI describes a common short backsplash as about 4 inches high, while its full-height examples can reach the cabinets or ceiling. Describe the actual stopping point when comparing quotes.
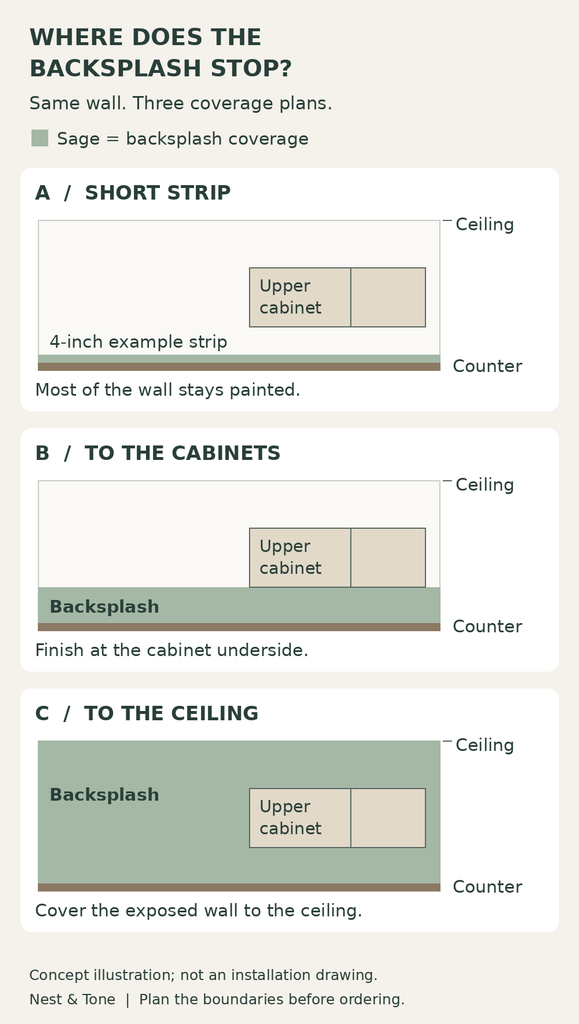
A short strip above the counter
A low strip leaves most of the wall painted. It can suit a restrained scheme, especially if it matches a countertop you want to keep. The important trade-off is the wall above it: a 4-inch strip does not cover splashes that land higher up.
Look behind the faucet and the place where wet dishes sit. If that painted area regularly needs wiping, decide whether the finish there is suitable or whether more backsplash coverage would be useful. Also check where your dish drying rack drains; extending wall coverage will not fix water collecting on the counter.
From the counter to the upper cabinets
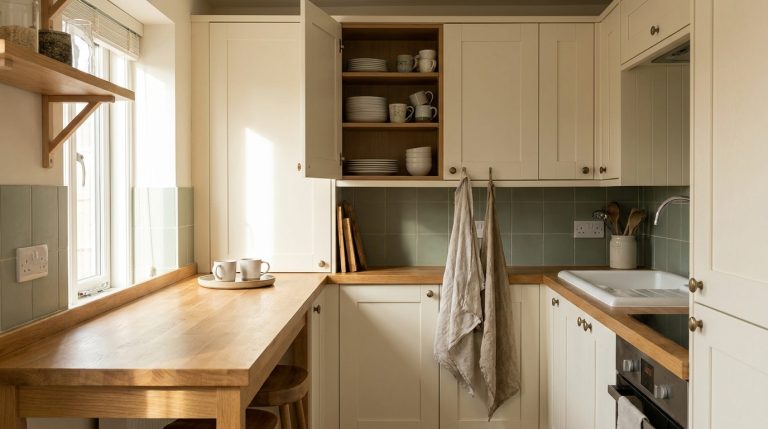
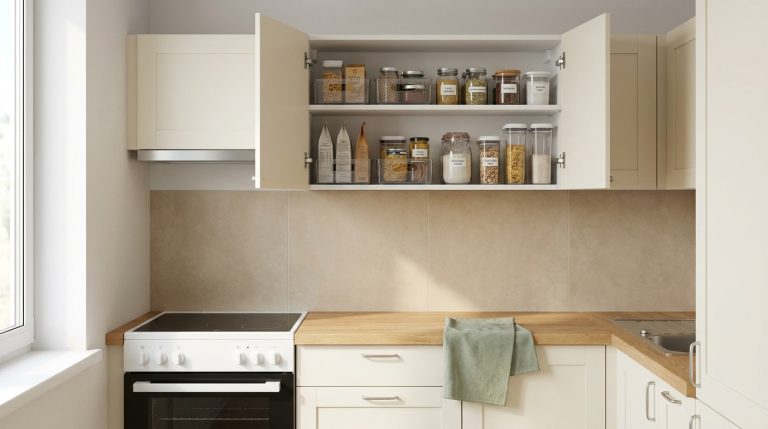
Here, the cabinet underside supplies a natural top boundary. Measure that gap in your own kitchen instead of treating a commonly quoted dimension as a requirement. Include lighting strips, valances and any change in cabinet height in the measurement.
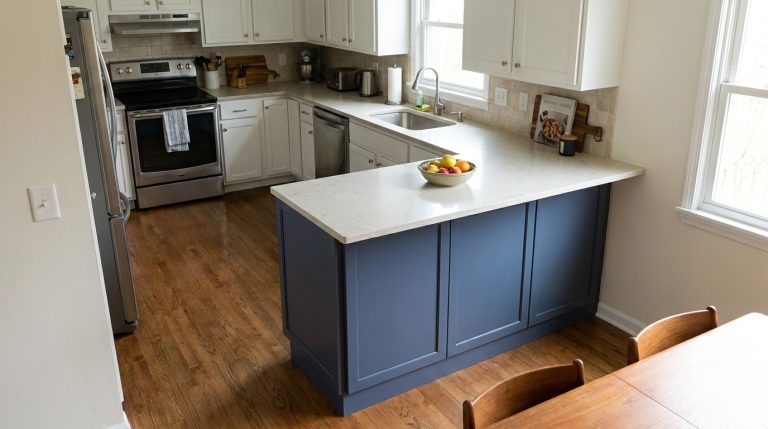
This arrangement also gives you a practical design question: what happens when the cabinets end but the counter continues? Decide that side boundary before choosing the tile layout. Otherwise, a tidy strip beneath the cabinets can end in an awkward isolated patch beside them.
Up the exposed wall to the ceiling
Taking the finish to the ceiling removes a horizontal transition across the exposed wall. It can make sense when you want that entire wall to read as one surface. It also expands the area being finished, including sections well above everyday splashes.
Ask what that extra coverage adds to the installed quote. Material quantity is only part of it: wall preparation, cuts, access, edge details and any slab seams matter too. Choose the taller treatment because you want that wall finished, rather than assuming every small kitchen needs it.
Where Should the Backsplash End at the Sides?
Use a clear physical boundary when one is available: an inside corner, door casing, tall cabinet or finished panel. When the wall continues beyond the kitchen work area, the counter edge and upper-cabinet edge may offer two different stopping lines. Neither is automatically right for every layout.
Consider a counter that extends 8 inches beyond the last upper cabinet. Stopping the backsplash at the cabinet creates a simple vertical alignment, but leaves the wall above those last 8 inches of counter painted. Extending it to the counter end covers that working area but needs a deliberate top and side finish. This is an illustrative layout, not a required dimension.
Mark both outlines on your photograph. Compare them from the doorway as well as directly in front of the counter. Then check what actually happens on the exposed section: is it a dry landing area, or where you set rinsed dishes and prepare food? Let that use help settle the choice.
A side wall needs its own decision. Continuing the backsplash around an inside corner can protect a splash-prone return, but carrying a narrow strip all the way to a projecting counter edge may look different from the front view. Draw the return on a second photograph so it is included in the agreed design.
Where tile ends against paint, specify the finished edge before installation. Depending on the tile, that might be a matching trim piece or a compatible profile. Schluter’s FINEC profile, for example, is designed to finish and protect exposed tile edges. Have the installer match the chosen detail to the tile and assembly.
When a Window Breaks the Line
A window above the sink creates several separate boundaries: the underside of the sill, the side trim and sometimes an exposed reveal. Start by deciding whether the window is interrupting a low band of backsplash or sitting within a larger finished wall.
If the backsplash stays below the window: agree how it meets the underside of the sill. Check whether the proposed height leaves a very narrow painted gap. Moving the top line to a clearer boundary may look more intentional than leaving a sliver that is awkward to finish.
If coverage continues beside the window: sketch the left and right sides together. A nearby cabinet may define one side while the other opens onto a bare wall. You can choose an asymmetrical outline, but it should be an agreed decision rather than a surprise created by the last row of tiles.
If the finish wraps into the opening: ask the installer to check the sill, trim projection, tile thickness and opening hardware. Adding material can change how the edges meet. Do not assume a photo showing a tiled window reveal will work around your existing frame.
Already Have a 4-Inch Stone Strip?
You can consider keeping a sound existing strip and adding tile above it. The design then contains three visible elements: countertop, short strip and tile. Hold a real tile sample above the strip and look at the top ledge, color change and meeting point from the side.
Keeping the strip may be the more manageable choice if it works with the new design. If your aim is one uninterrupted tile surface from countertop to cabinets, discuss removal before ordering. Ask the installer how the strip is attached, whether removing it could damage the countertop or wall, and what repairs would be included.
Avoid choosing tile solely to use up the gap above the strip. Check the proposed rows, grout joints and cuts as a complete layout. Daltile’s backsplash tile sizing advice similarly emphasizes the relationship between tile scale, cabinet spacing and the area being covered.
Treat the Cooking Wall as a Separate Check
The wall behind a range may need a different outline from the sink wall. A higher central panel can be a design option, but its height and material must work with the actual range, hood and wall assembly. Confirm the appliance installation instructions and material requirements before finalizing this section.
A surface suitable for ordinary splashes is not automatically suitable for every heat exposure. For example, Cambria’s product-care guidance states that its quartz is not heat-proof. Have the installer confirm suitability for the proposed location rather than treating a full-height slab as permission to reduce appliance clearances.
Plan for countertop appliances too. If a toaster, air fryer or kettle will stand near the backsplash or beneath cabinets, follow that appliance’s placement instructions. Our guide to placing small kitchen appliances addresses the space they need during use, not just where they fit when switched off.
Give the Installer an Outline, Not Just a Height
Once the main boundaries make sense, ask for the proposed layout on a drawing or marked photograph. Show each wall separately. Include the outlets, switches, window trim, cabinet lighting and exposed edges so the quote describes the same job you are imagining.
A useful brief might read: “On the sink wall, start at the countertop and finish beneath the upper cabinets. Continue below the window to the agreed sill detail. At the open end, stop at the countertop edge and finish the exposed top and side with the selected trim. Confirm the cooking-wall specification separately.” Adapt the wording to your actual kitchen.
Before approving it, ask the installer to show where narrow cuts and slab seams would land, which edges remain visible, and how countertop transitions and changes of plane will be detailed for the chosen system. Electrical fittings affected by the new wall thickness should be handled appropriately by a qualified electrician.
Keep a copy of that marked plan with the tile or slab selection and quote. A backsplash height written as “to underside of cabinets, with the window and side edges shown” gives you a much clearer agreement than “standard height” on its own.